Screen printing my own t-shirts means I can print an order when it comes in, rather than buying a big batch from a supplier and finding somewhere to store all that merchandise. It’s a very DIY setup, but it’s how I print the t-shirts in my online store.
You don’t need a fancy printing press to do this at home. My setup involves homemade screens, a desk, some clamps, and a squeegee. The trickiest part isn’t actually printing the shirt. It’s getting your design onto the screen in the first place.
That part uses light-sensitive emulsion and UV light to create a stencil. It takes a little experimenting to get right, but once you have a usable screen, the printing is much less scary and a lot more fun.
What You'll Learn
- Coat both sides of the screen evenly and dry it overnight in complete darkness.
- Use an opaque black transparency to keep your design washable during UV exposure.
- Test sunlight exposure each session because weather, time, and location affect the timing.
- Let the printed shirt dry completely, then heat-set it according to your ink’s instructions.
Table of Contents
- What You Need for DIY Screen Printing
- 1. Start With a Blank Screen
- 2. Coat the Screen With Emulsion
- 3. Prepare Your Design on Transparency Film
- 4. Test the Exposure Time, Then Expose Your Screen
- 5. Wash Out the Design and Harden the Remaining Emulsion
- 6. Position the Screen and Print Your T-Shirt
- 7. Let the Print Dry, Then Heat-Set the Ink
- Keep the Step-by-Step Guide Handy
What You Need for DIY Screen Printing
It helps to gather everything before you start, especially because the emulsion needs to be handled in very dim light.
For preparing and exposing the screen
- A blank screen-printing frame: You can make one using wood and mesh fabric, or buy a ready-made screen from an art supply shop.
- Photo emulsion and sensitizer: Choose products designed to work together and follow their mixing instructions.
- Tall pushpins: These act as little feet to keep the coated mesh off your work surface. Flat drawing pins won’t do the same job.
- Plenty of newspaper: Protect both your work surface and the shelf where your screen will dry.
- A straight-edged piece of card or a squeegee: You’ll use this to spread the emulsion.
- A completely dark drying space: I empty out my wardrobe and use that overnight.
- Your design printed in black on transparency film: A print shop can usually do this from your design file.
- A test screen: Use this to work out the exposure time before risking your proper design.
- A shower nozzle and a soft scrubbing brush: These are what I use to wash the design out after exposure.
For printing the t-shirt
- A blank t-shirt and newspaper to put inside it.
- A desk or other work surface, plus clamps to hold the screen in place.
- Screen-printing ink and an old spoon.
- A printing squeegee.
- A small paintbrush or silicone-tipped tool for any touch-ups.
- An iron to heat-set the ink once it is completely dry.
I’ve collected the tools and equipment I use in one place if you need help finding supplies.
1. Start With a Blank Screen
Most of my frames were made by me and my dad. Mostly my dad, if I’m honest! Making them ourselves fits the whole DIY approach, and it also makes failed attempts feel a little less painful.
If you’d like to make yours too, my screen-printing frame tutorial explains that part of the process. Buying a blank screen is absolutely fine as well.
Before coating it, identify the two sides of the frame:
- The flat side: The side where the mesh sits against the outside face of the frame.
- The recessed side, or well: The inside of the frame, where you’ll put the ink and move the squeegee when printing.
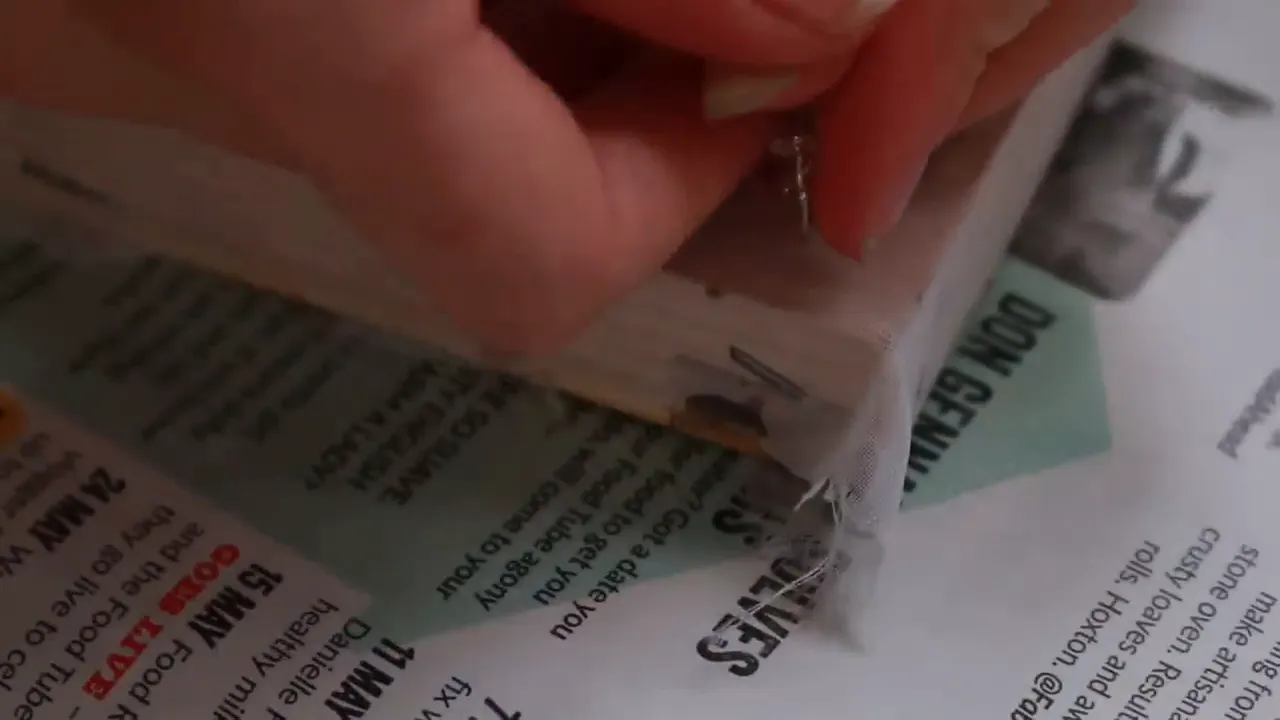
Put a tall pushpin into each corner of the frame’s flat side. The screen should be able to rest on those pins without the mesh touching the surface beneath it.
2. Coat the Screen With Emulsion
Mix and apply your emulsion in very dim light, away from sunlight. Once emulsion and sensitizer are combined, the mixture hardens when exposed to UV light. You don’t want that happening before your design is ready.
I use a diazo emulsion system. The particular product I use calls for two half-ounce bottles of sensitizer per jar of emulsion, but that is not a universal recipe. Follow the instructions supplied with whatever you buy.
- Cover your work surface with plenty of newspaper.
- Mix the emulsion and sensitizer according to the product instructions.
- Use a straight-edged piece of card or a squeegee to spread a thin layer over both sides of the mesh.
- Make sure the whole screen is covered, keeping the coating as even as possible.
- Place the screen flat-side down on its pushpin feet in your dark drying space.
- Leave it to dry overnight, with newspaper underneath to catch any drips.
Getting an even coating in dim light is awkward at first, but you do get the hang of it. This stuff can be bright green or blue, depending on the product, and it’s messy. Protect your table and try not to get it on your clothes.
Why the drying direction matters
You could turn the frame the other way up and rest it on the wood, but I use the pushpins for a reason: I want the inside of the well to stay as smooth as possible.
That is the surface the squeegee will travel across when I print. With this DIY coating method, drips sometimes form as the emulsion dries. It’s better to have those bumps on the outside of the screen than in the well where they could get in the way.
3. Prepare Your Design on Transparency Film
Once the coated screen is completely dry to the touch, it’s ready for exposure. You’ll need a transparency with your design printed as dark and black as possible.
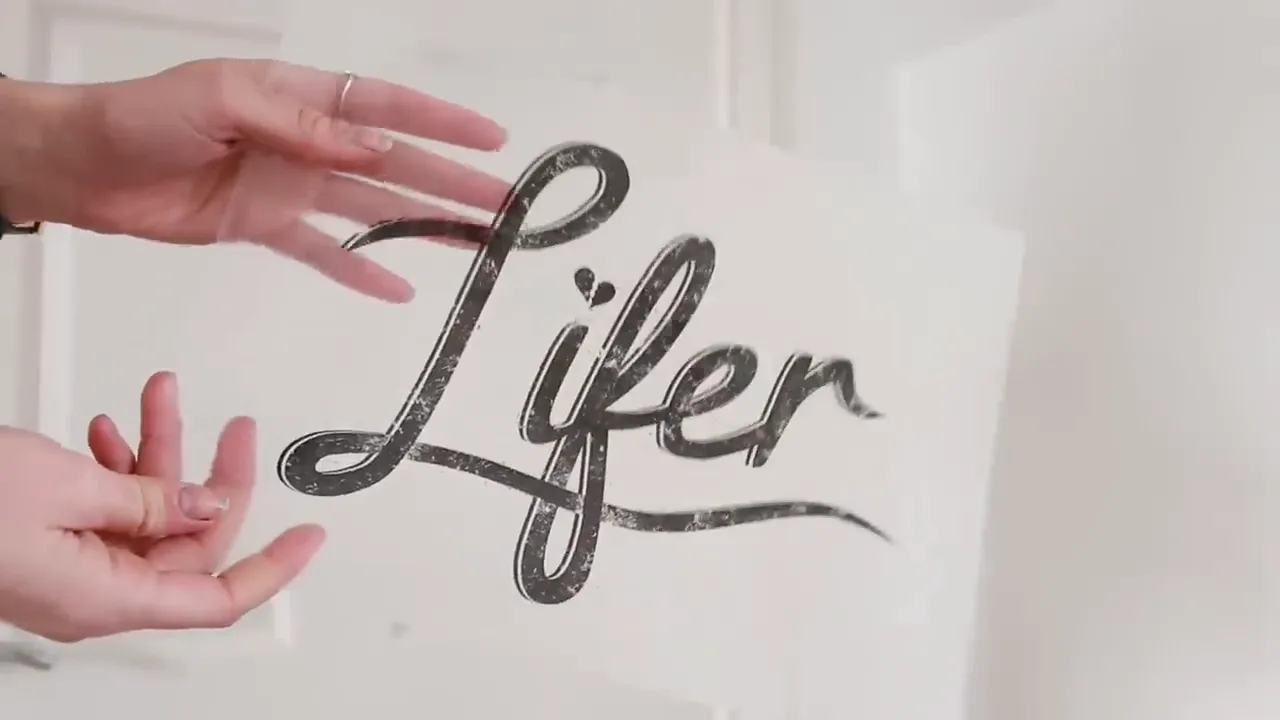
The black design blocks the light. During exposure, the emulsion around it hardens, while the emulsion directly beneath the black areas stays washable. Washing those areas away creates the openings that your ink will pass through.
I sometimes print two copies of a design, line them up exactly, and stick the transparencies together to make the black more opaque. I don’t always find that necessary, but it’s something I’ve used when preparing my designs.
Place the design back-to-front on the flat side of the screen. That orientation matters, particularly if your design includes lettering.
4. Test the Exposure Time, Then Expose Your Screen
This is definitely the fiddliest part of the process. Before exposing a proper design on a good screen, use a test screen to work out how long the emulsion needs in the sun.
There isn’t one exposure time I can give you that will work everywhere. It changes with:
- The weather.
- The time of day.
- Where in the world you are.
My own exposure times have ranged from about 20 seconds to one minute, but those are examples of what has worked for me, not a timing recommendation for your setup.
For this sunlight method, I do a fresh exposure test each time I’m preparing to expose screens. Once you’ve established the timing for those conditions, expose your coated screen outside with the transparency in place.
The sun will harden the exposed emulsion, while the black parts of your design protect the areas you’ll wash out next.
Please don’t feel bad if you don’t get this right the first time. I got plenty of screens wrong while learning. One nice thing about homemade frames is that you can cut out the mesh, fit new fabric, and have another go.
5. Wash Out the Design and Harden the Remaining Emulsion
Bring the exposed screen back inside and wash away the emulsion underneath the design. I use a shower nozzle and, when needed, a soft scrubbing brush to help it along.
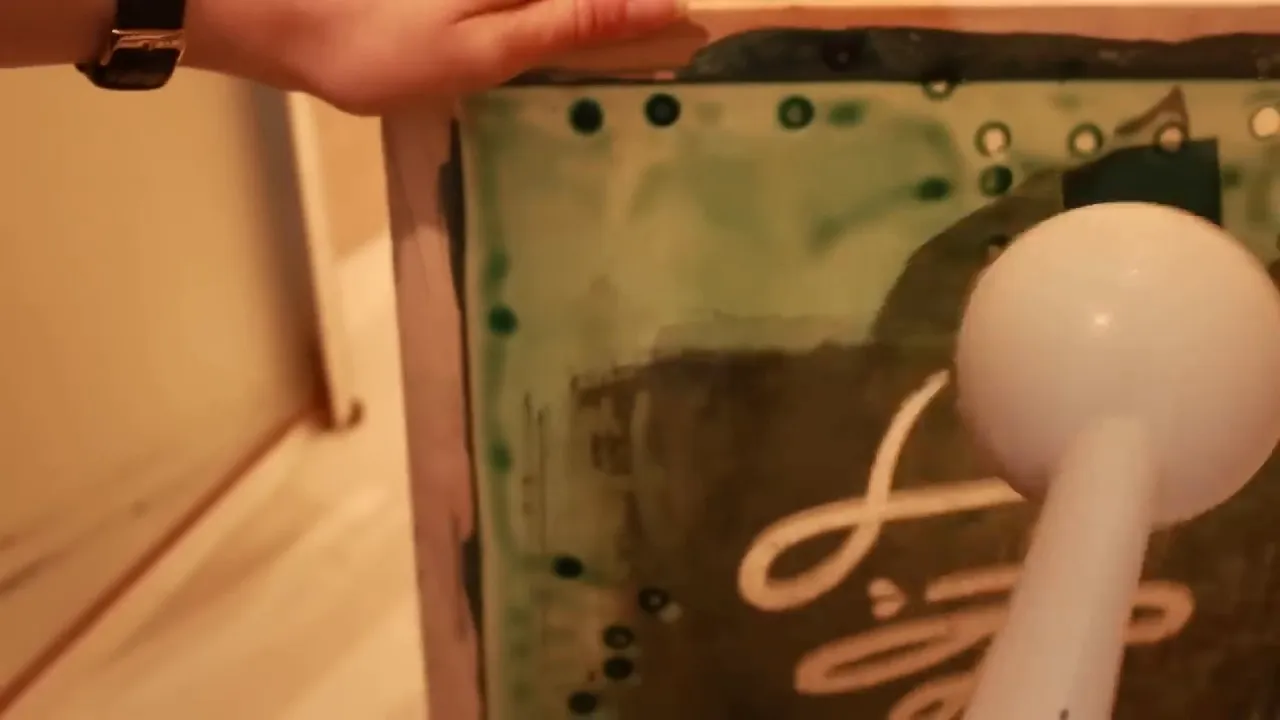
This can be a slightly tense moment. Sometimes the emulsion seems stubborn enough that I’m convinced it isn’t going to come out, and then the design suddenly starts clearing.
Once the design has washed out and you can clearly see the open mesh, I put the screen back in the sun to harden the remaining emulsion thoroughly. At this point, the emulsion in the design itself has already been removed, so that second exposure won’t close those openings.
6. Position the Screen and Print Your T-Shirt
Now for the much more enjoyable part. You don’t need a specialist printing setup for this. I put newspaper inside the t-shirt, lay it on my desk, and position the screen on top.
Line up the design
Getting the placement right can be surprisingly difficult. I peek underneath as I lower the screen so I can judge where the design will sit.
I also mark the centre of the design on the frame. That gives me a reference point to line up with the t-shirt’s label. Once I’m happy with the position, I clamp the screen to the desk to hold it steady.
Apply the ink
- Use an old spoon to put a line of screen-printing ink across the top of the design inside the well.
- Pull the squeegee firmly and quickly across the design.
- Work back and forth until the design is covered.
- Remove the clamps and carefully lift the screen away from the shirt.
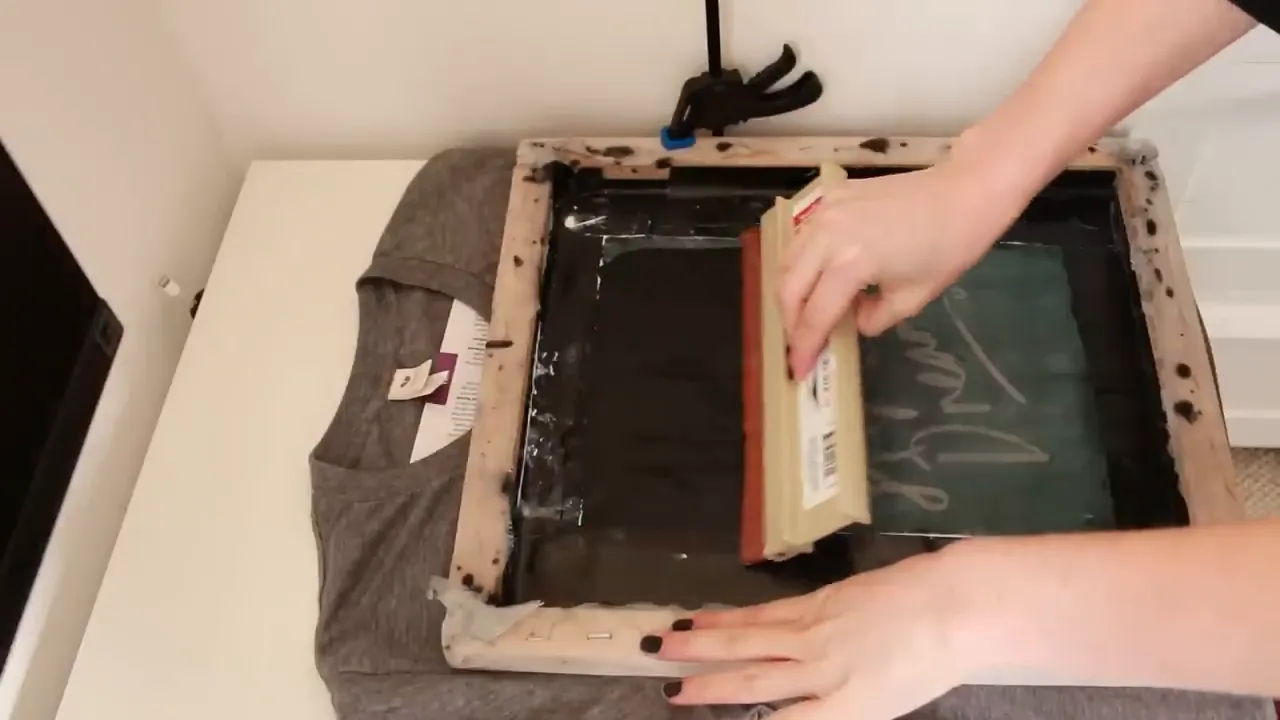
My screens aren’t perfect. They are DIY, after all! Sometimes I need to fill in a small area with a little paintbrush or a silicone-tipped tool after lifting the screen. A few careful touch-ups are part of my process.
7. Let the Print Dry, Then Heat-Set the Ink
Leave the printed t-shirt to dry completely before heat-setting it with an iron.
Follow the heat-setting instructions on your ink bottle. The inks I’ve used have generally needed around six to eight minutes of heating, but your product’s instructions should determine the timing and settings you use.
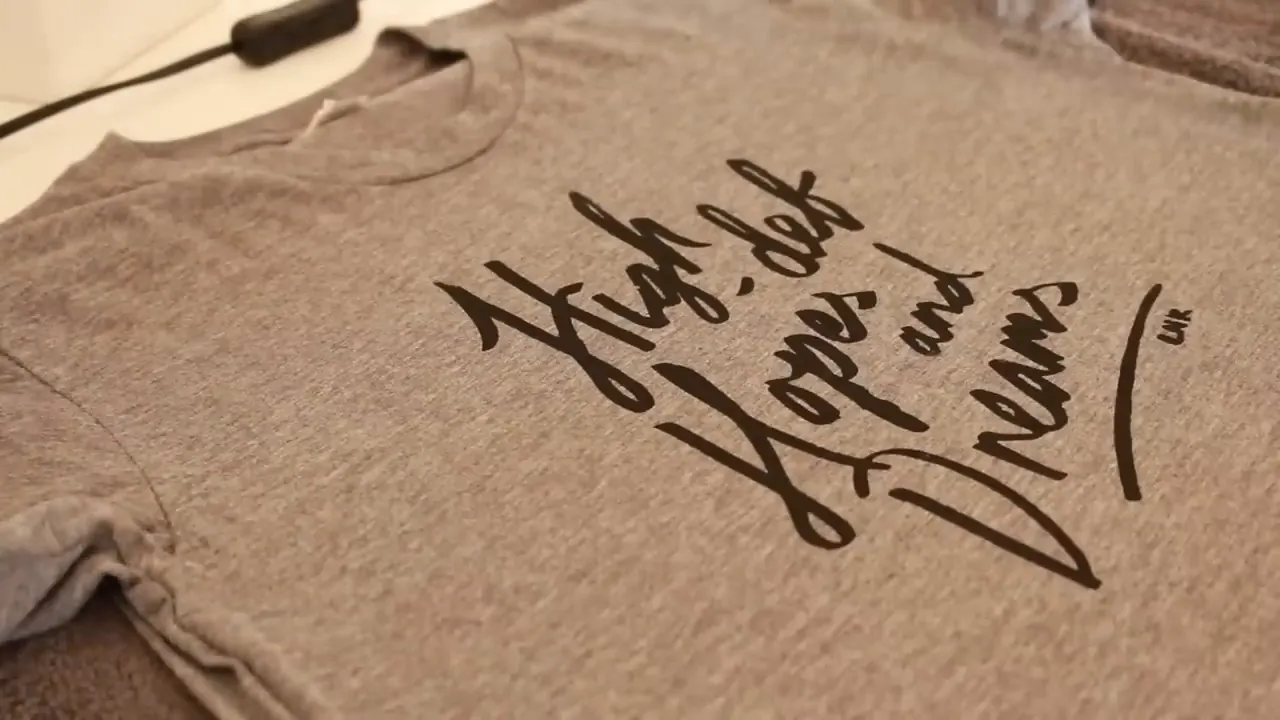
And then you have a t-shirt you’ve printed yourself, which is a pretty exciting feeling. The screen preparation takes patience, but being able to turn your own design into an actual shirt makes it worthwhile.
Keep the Step-by-Step Guide Handy
I’ve made a downloadable PDF with more detailed instructions for making frames, exposing screens, and printing t-shirts, including the exposure-testing process. You can get it by entering your email on my screen-printing page. It’s useful to have the steps written out beside you while you work, especially for that first attempt at exposure.


