I started this project feeling like I was either going to end up with a really cool keyboard or a very expensive mistake. There didn’t seem to be much room in between.
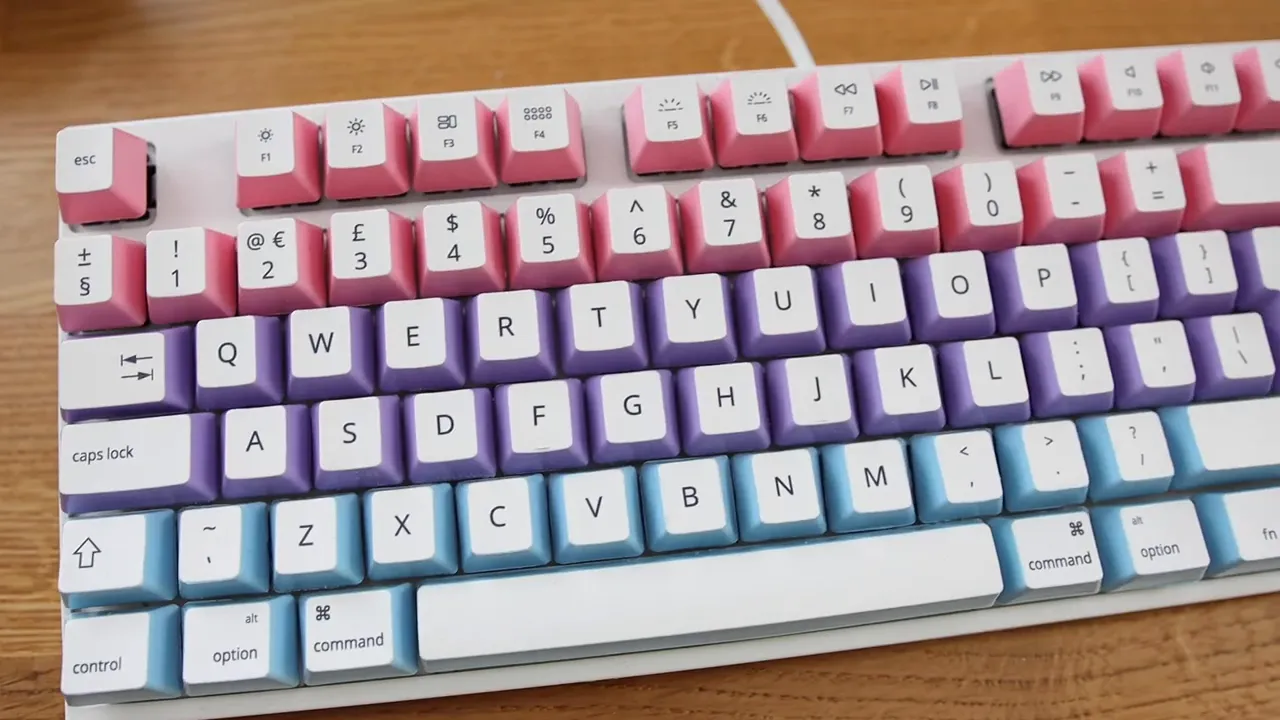
The idea was to paint the sides of my mechanical keyboard’s keycaps in pastel blue, purple, and pink, creating a gradient up through the rows while keeping the white tops and their symbols intact. Simple enough as a concept. As an actual DIY project involving 88 individual keys? A little more involved than I’d imagined.
There was a lot of sanding, a brief period of regret, and then quite a lot of happiness. Here’s how it all came together.
Why I Decided to Paint My Keycaps
I bought my mechanical keyboard for two main reasons. I’d heard good things about the typing experience, including claims about efficiency and ergonomics. But, honestly, I’d also seen so many photos of beautiful mechanical keyboards with interesting keycaps and color schemes. I wanted something like that sitting on my desk.
Mine is a Varmilo V88 with what I believe are silent red switches. I chose the Mac version because I wanted the Mac function keys and symbols, but I struggled to find a replacement keycap set that gave me the look I wanted while keeping those details.
So I thought: perhaps I could paint the keycaps I already had.
Painting only the sides was the important part of the plan. If I painted the entire keycap, I’d have to work out how to put all the letters and symbols back on afterward. Leaving the tops untouched meant I could keep the useful parts of my existing set and add color around them.
I picked out three spray paint colors: a pastel blue, a purple, and a pink. The plan was blue along the bottom of the keyboard, purple through the middle, and pink at the top.
Step 1: Remove the Keycaps, Sand, and Mask
Before removing anything, I took a photo of the keyboard. I absolutely did not trust myself to remember where every key belonged, especially once they were all separated and painted.
Removing the keycaps was surprisingly fun. Preparing them afterward was where I began to understand the scale of what I’d signed up for.
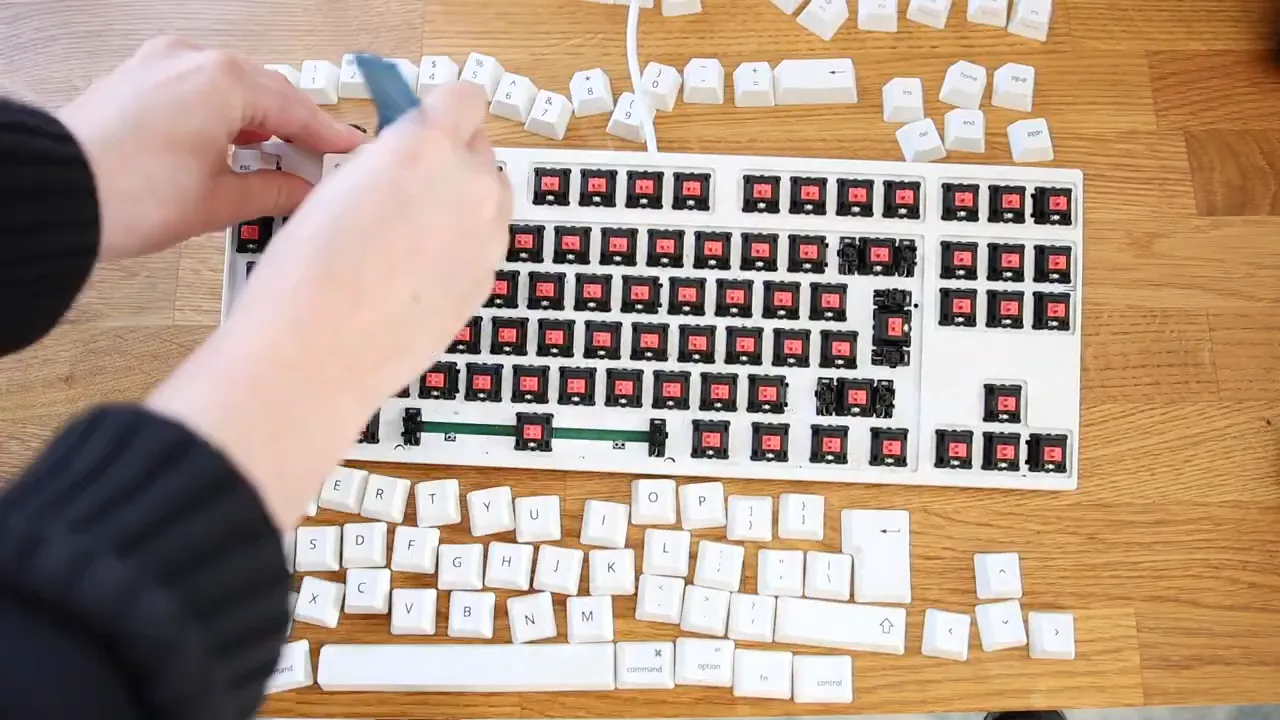
The preparation process was:
- Remove all the keycaps, keeping the layout photo for reference.
- Sand the sides that would be painted.
- Mask off the top and bottom of each keycap, leaving the sides exposed.
Sanding and applying tape took much longer than I expected. Although, really, I’m not sure why I thought doing anything individually to 88 keys would be quick.
The tape on the tops needed to protect the original white surface and the printed symbols. My hope was that it would give me a clean boundary between the white top and the painted sides, without any paint bleeding underneath.
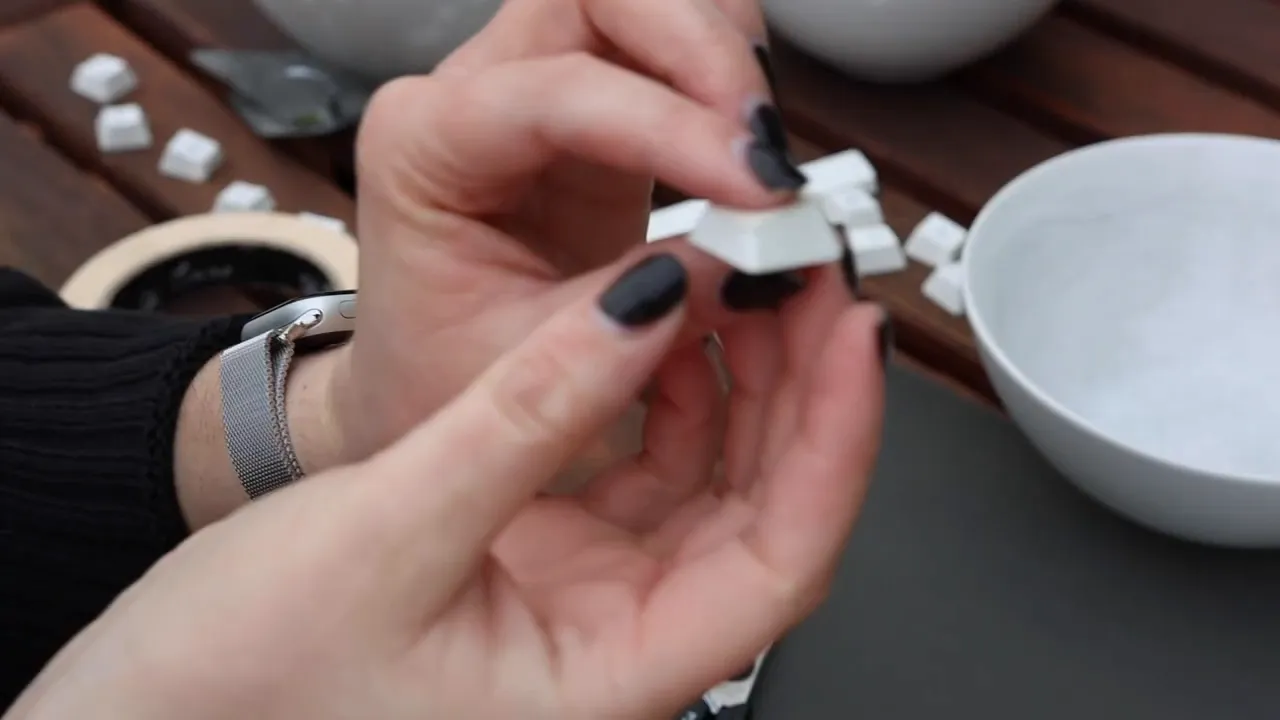
Even at this stage, I suspected there might be a bit of cleanup later. That turned out to be correct.
Step 2: Prime and Paint the Sides
With the sanding and masking finished, I applied a plastic primer and let it dry. The primer was clear, which surprised me. I’d expected it to have some color, but the keycaps looked almost unchanged afterward.
Then came the scary part: actually adding the paint.
I painted the keycaps in groups according to where they would sit in the finished keyboard. Keeping the colors organized mattered because the whole effect depended on the rows flowing from blue to purple to pink.
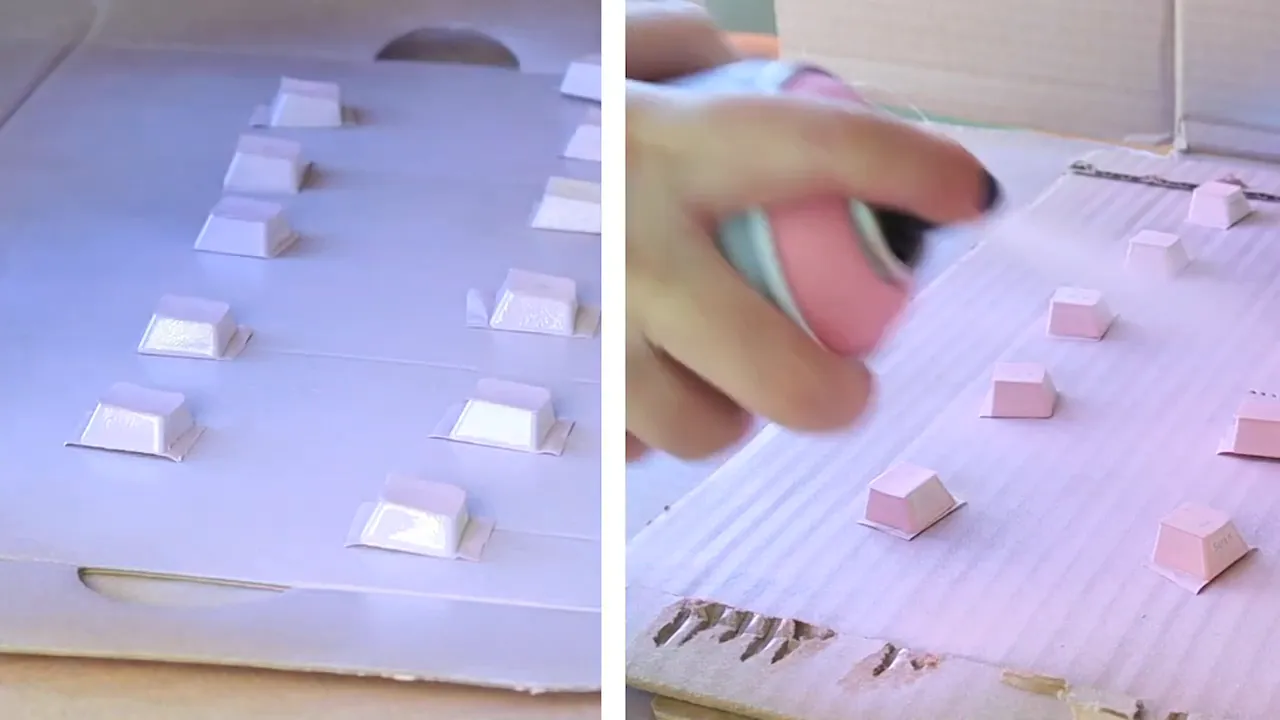
Once the color was on, I inspected the keycaps and touched up areas that needed a little more attention. At that point, I was feeling cautiously pleased. I still couldn’t tell whether the masking had produced the clean edges I wanted, but the colors themselves looked so good.
That was the first moment when the idea started to feel like it might actually work.
Step 3: Add a Top Coat, Then Experience Some Regret
The next day, the painted keycaps were dry and ready for a top coat. Before applying it, I could already see a few places where paint had seeped underneath the masking. Those would need fixing once the tape came off.
I applied the varnish, let it dry, and discovered a different problem.
Most of the surfaces looked fine, but a few keycaps had developed a puckered texture on one side. Interestingly, it was mostly the pink ones. I wondered whether the pink paint and the varnish weren’t getting along, but I couldn’t say for sure what caused it.
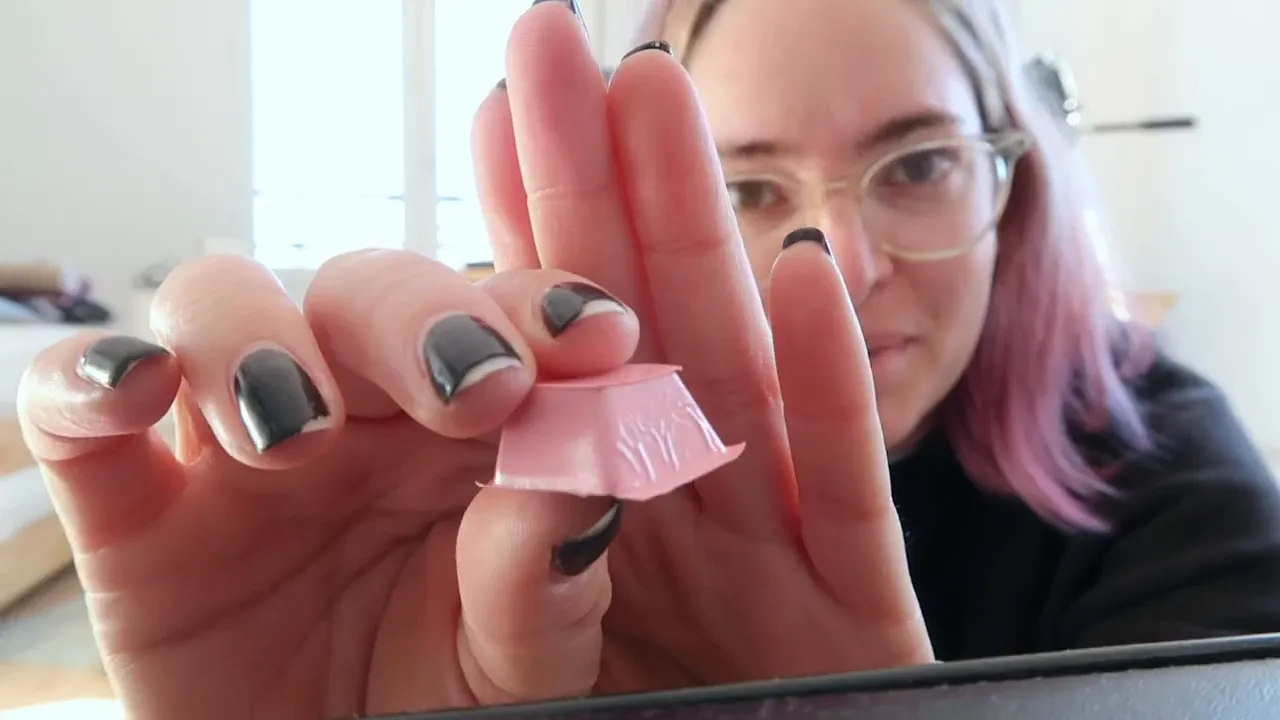
This was the regret stage. I’d been so happy with the colors, and now I had these little wrinkly patches to deal with.
Rather than accept them as they were, I decided to try sanding down the affected areas and work out whether they needed repainting or more finishing afterward. I wanted to get the result a little closer to what I’d imagined.
The top coat wasn’t an entirely smooth final step in my project. It created more work on a handful of keys, so I wouldn’t present my experience as a foolproof recipe for a perfect finish.
Step 4: Inspect Every Key and Fix the Rough Bits
The next phase was a very glamorous production line of removing tape, inspecting keycaps, and making two piles:
- Good to go: ready to put back on the keyboard.
- Needs work: anything with rough edges, paint bleed, or a finish I wasn’t happy with.
Sanding seemed to help with the problem areas. Some keys only needed a small touch-up at the bottom where the paint had stuck to the tape. Others needed more attention.
One little pink-sided seven key was a particularly encouraging moment. With the tape removed and the edges cleaned up, it looked exactly how I’d hoped: a white top with its original symbol and cute pastel sides.
It went straight into the good pile. Finally, proof that all this fiddly work was worth doing.
I worked through the rest individually, getting each one as good as I could. This wasn’t the quick final tidy-up I might have liked, but it was what brought the project together.
Step 5: Put the Keyboard Back Together
Once the keycaps were ready, I put them back onto the keyboard in their original positions, using the layout photo as a reference.
Seeing the rows build up was so satisfying. The separate groups of painted pieces finally became the blue-to-purple-to-pink keyboard I’d pictured at the start.
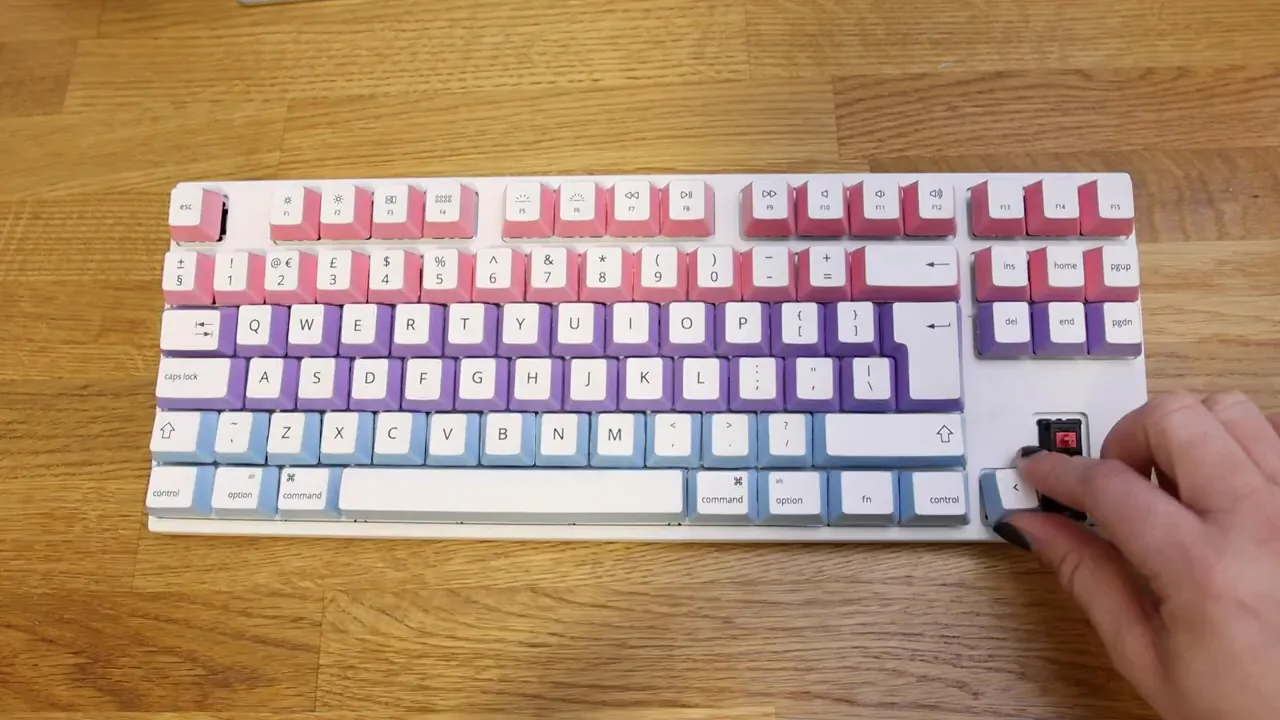
The finished result was almost exactly what I’d had in mind. There are little imperfections if you look closely, but I’m okay with that. It was a DIY project, and I wasn’t expecting a factory-perfect finish.
How the Painted Keycaps Held Up
After a couple of weeks of use, the painted keyboard was holding up well, including through my occasionally rather aggressive typing. That’s only an early update, not a claim about years of durability, but I was really happy with how it was doing.
Having the keyboard out of action during the project also clarified something for me. I went back to my Apple keyboard while I was painting, and I really noticed how much I preferred typing on the mechanical one.
So yes, wanting a cool-looking keyboard was part of why I bought it. But the typing experience matters to me too. Being without it for a while made that much more obvious.
Was It Worth All That Sanding?
This was a very time-consuming project. Sanding every one of those 88 keys, masking them, painting them, and then sanding some of them again was a lot. Add the drying stages and the fixes, and it was definitely more than a quick desk makeover.
If you’re considering something similar, I recommend the keycap-painting tutorial I learned from. It goes into much more detail on the techniques than my own experiment does.
For me, though, no regrets. I have a keyboard that feels more like mine, and it makes me happy every time I look down to type.
That’s what I want from the things in my office. They need to work well, of course, but there’s a lot of joy in making an everyday piece of hardware a little more personal.


