A plain cushion is a lovely starting point for a bit of personalised home decor. I picked up a giant grey one from IKEA knowing I wanted to add a design, but instead of screen printing onto it, which is usually my go-to method for fabric, I tried embroidery.
It was surprisingly simple. Time-consuming? Definitely. My lettering took a few hours to sew, but the slightly raised, textured finish made it completely worth it.
I chose the phrase “That’s the spirit” from a Bring Me The Horizon song because I love both the lyric and the sentiment. You could use a favourite phrase, your own lettering, or a shape instead. It doesn’t have to be words to make the cushion feel like yours.
What You’ll Need
- A plain cushion cover and cushion inner. I used an IKEA Gurli cover and Fjädrar inner.
- A design printed onto paper, unless you’d prefer to draw directly onto the fabric.
- Tailor’s chalk.
- A pencil for tracing.
- Embroidery thread. I used white gold thread against the grey fabric.
- A needle.
- For the optional reverse-side border: a ruler, gold screen printing ink, and a flat paintbrush.
Work on the empty cushion cover so you can reach the inside as you stitch. The inner goes back in once your design is finished.
1. Create a Single-Line Design
For this embroidery method, you want a monoline design: a line that stays the same thickness throughout, rather than lettering with a mixture of thick and thin strokes.
I really liked the style of the Bloomsbury font from Vintage Design Co, but it wasn’t the even-weight line I needed. To adapt it, I used the Pen tool in Adobe Illustrator to draw through the middle of each letter. That gave me a clean, single-line version while keeping the lettering style I loved.
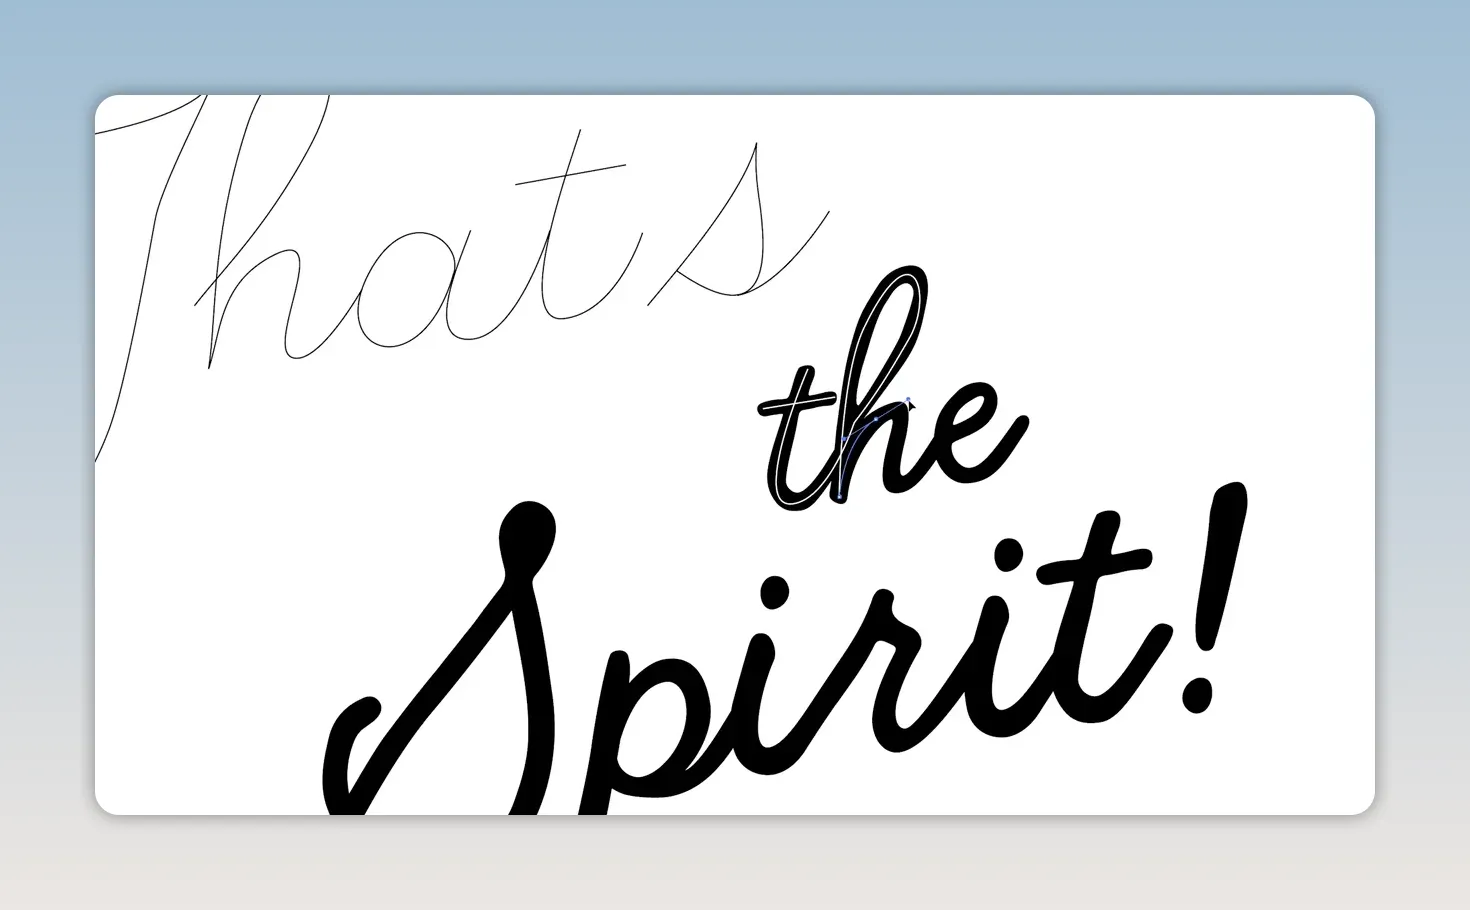
You could also draw your lettering from scratch. The important thing is to create a clear path for your stitches, rather than an outline you would need to fill.
2. Transfer the Design with Tailor’s Chalk
Tailor’s chalk is handy here because it gives you temporary guidelines that are designed to brush off fabric.
- Coat the back of your printout with chalk. Go over it repeatedly to build up plenty of chalk dust behind the design.
- Position the paper on the cushion cover. Keep the printed design facing up and the chalk-covered side against the fabric.
- Trace the design with a pencil. The pressure transfers chalk from the back of the paper onto the cover.
- Lift the paper and strengthen the guidelines. The transferred marks will probably be quite faint, so go over them directly with the chalk until they’re easy to follow.
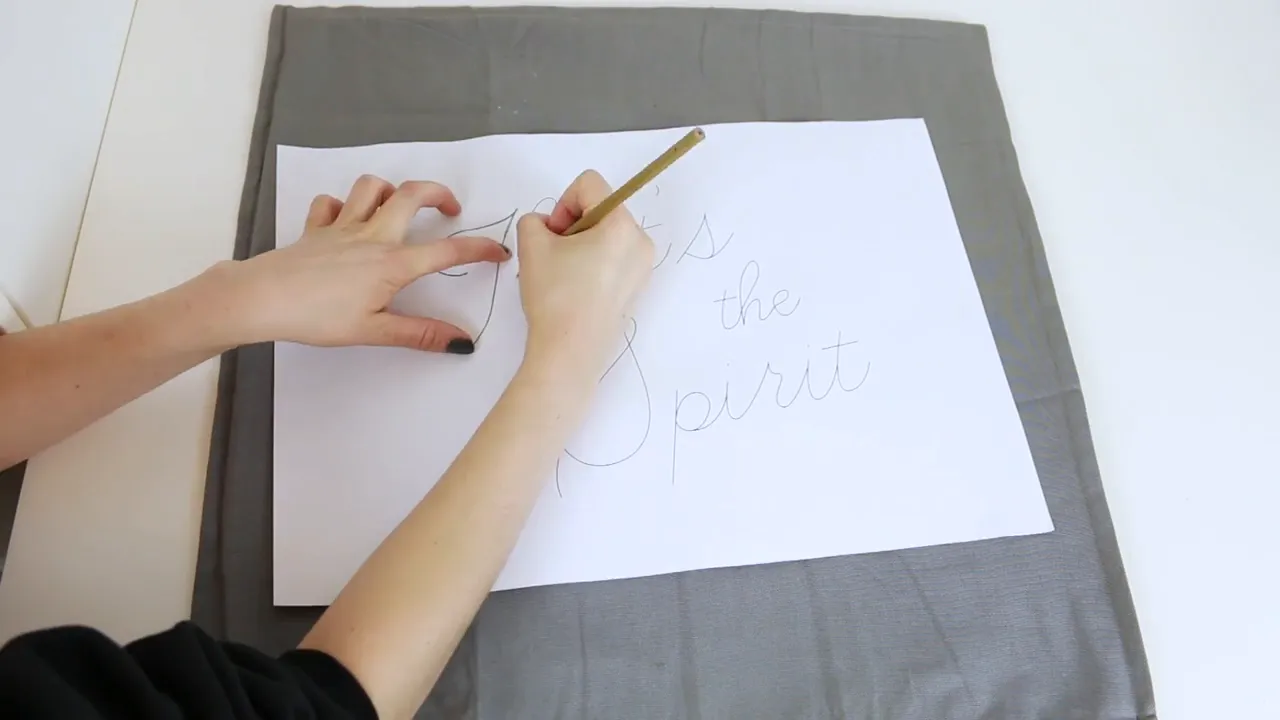
If you’re happy drawing freehand, you can skip the computer and printout entirely. Just draw straight onto the cover with tailor’s chalk.
3. Prepare Your Embroidery Thread
Embroidery thread comes in so many colours, which makes this an easy project to customise. I went with a light gold because I thought it would look lovely against the grey.
Separate out two strands of embroidery thread and feed them through the needle. Bring the ends together and tie a knot. Doubling those two strands back on themselves gives you the thread thickness used for this design.
Starting from inside the cover, push the needle out through the fabric at the end of your first letter. The knot stays on the inside and holds the thread in place.
4. Stitch a Dotted Line, Then Fill the Gaps
The stitching is simple because you build the finished line in two passes.
First, sew along your chalk guideline using stitches a couple of millimetres long, with gaps of roughly a couple of millimetres between them. Keep the thread lying flat and pulled snug against the fabric. At this stage, the lettering will look like a dotted line.
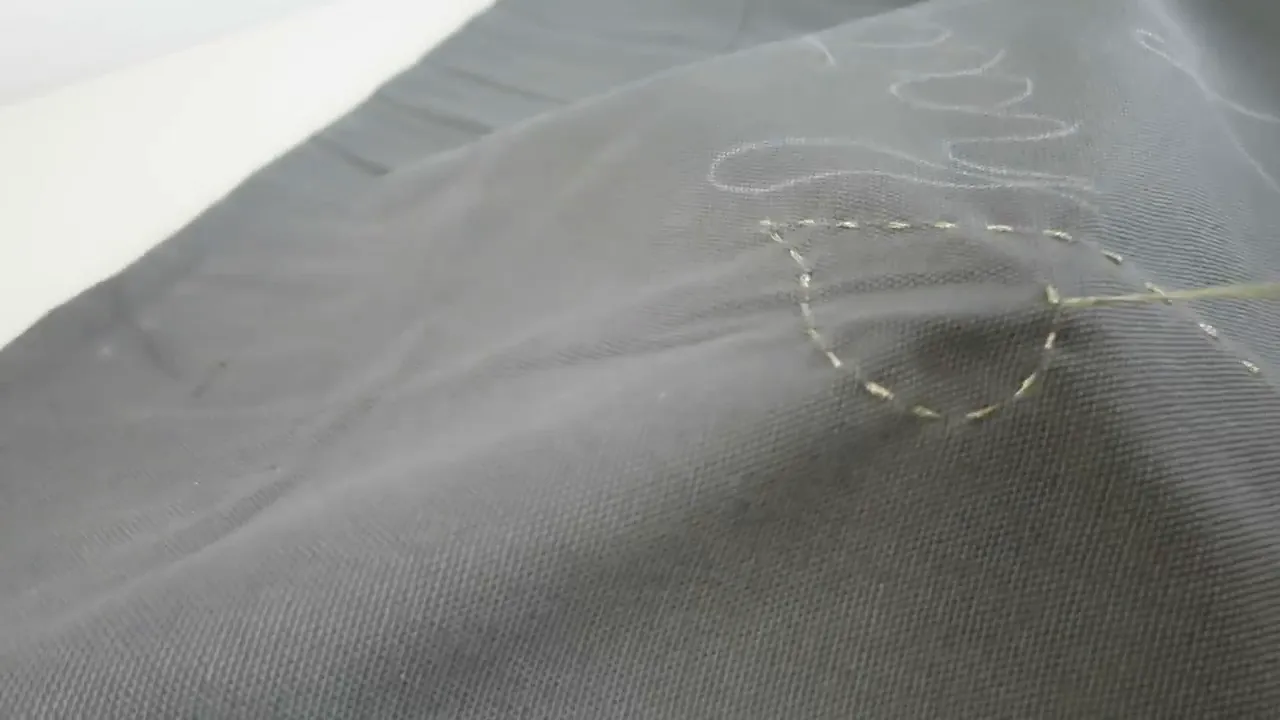
When you reach the end of the line, work back along it, stitching into the spaces you left. Try to bring the needle through the same hole, or as close as possible to the hole, at the end of the neighbouring stitch. This helps the separate stitches join into a neat, continuous line.
Keep repeating that process along the design: stitch a dotted line, then return to fill the gaps.
Leave enough thread to secure the end
Stop when you have about 10 cm of thread left. That gives you enough to tie a knot on the inside of the cover without struggling with a tiny end. Then prepare a fresh thread and carry on.
Sort out an uneven strand gently
Sometimes one strand won’t pull through neatly with the others. If that happens, gently tug the strands individually until you find the one causing the problem, then ease it through to catch up with the rest.
This is the part that takes patience. Mine took a few hours, but seeing the lettering turn into an actual textured design was so satisfying.
5. Add an Optional Gold Border to the Back
I wanted my cushion to be double-sided, so I gave the reverse a simpler design: a painted gold border.
Use a ruler and tailor’s chalk to mark a border all the way around the back of the cover. The guideline helps keep the line from becoming too wonky. Then use a flat paintbrush and gold screen printing ink to paint over it.
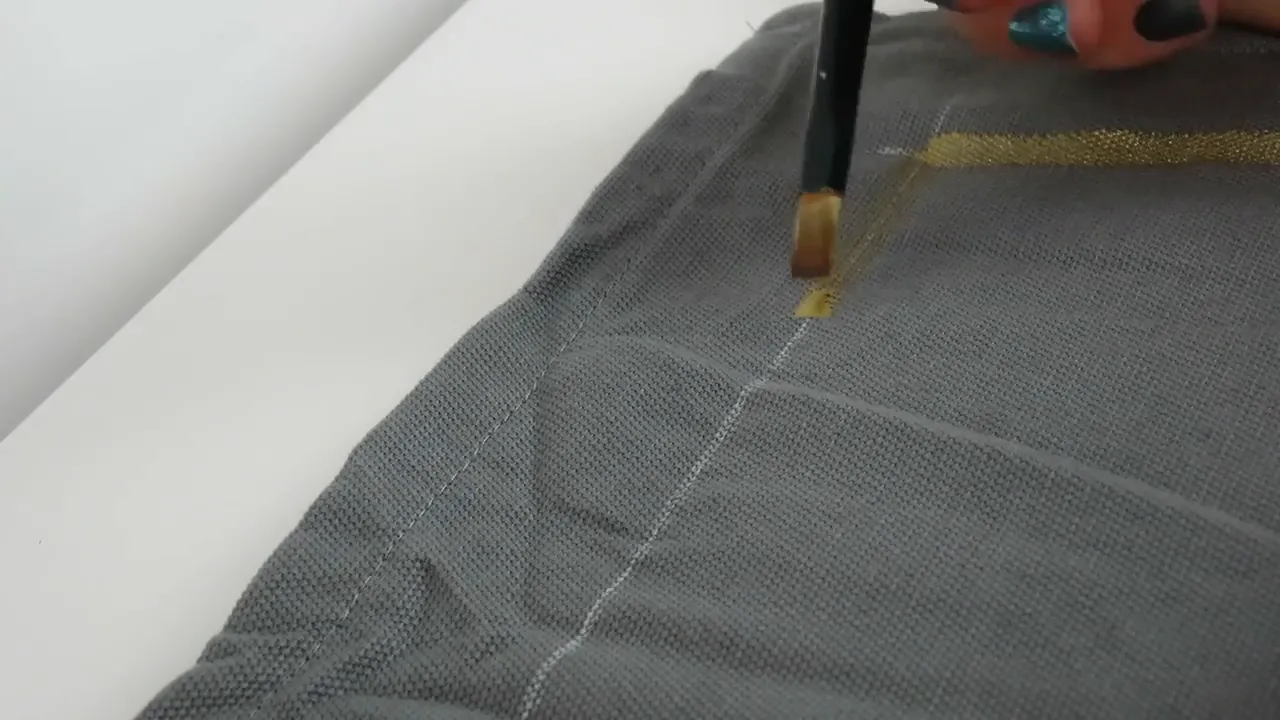
It’s a different finish from the embroidery, but the gold ties the two sides together. One side has the detailed lettering, while the other keeps things simple.
A Personalised Cushion with Two Different Looks
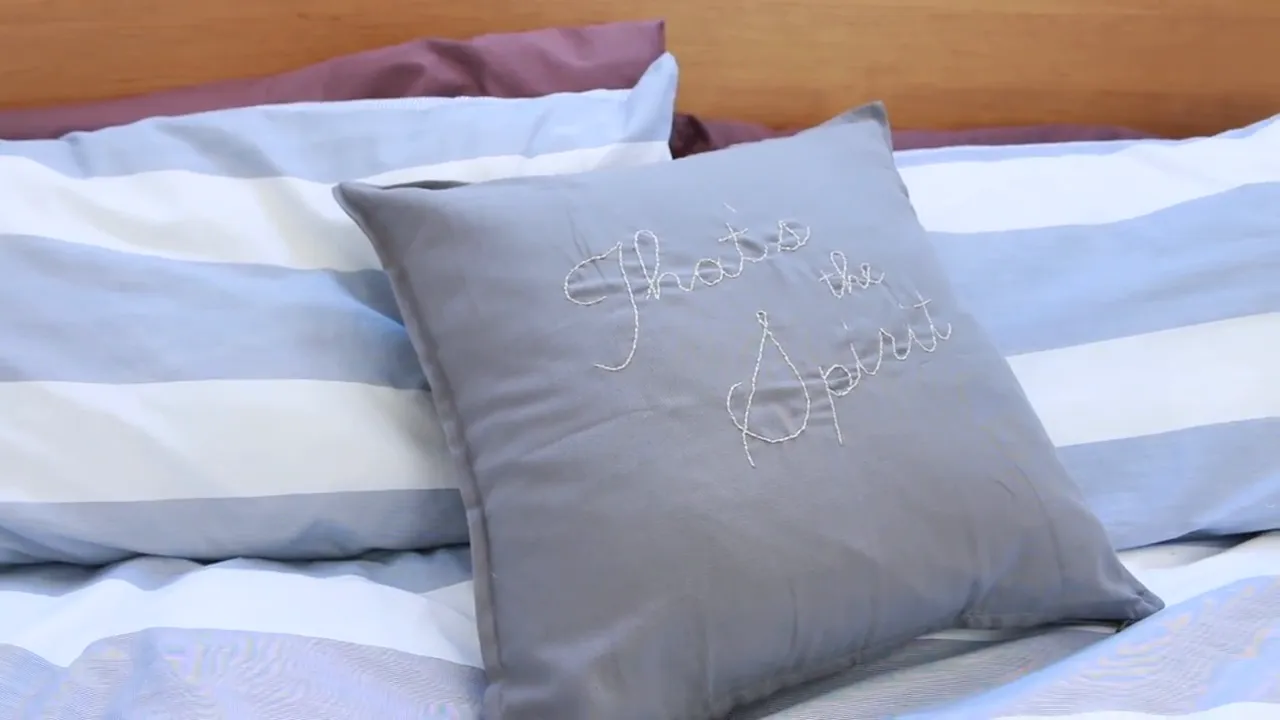
I’m so pleased with how the embroidery turned out. It’s exactly what I had in mind, which doesn’t always happen with DIY projects!
The lyric adds something personal to my bed, and the thread gives it a texture I wouldn’t get from printing alone. Whenever I feel like a change, I can turn it around and have the gold border facing out instead. A few hours of simple stitching turned a plain grey cushion into something that feels much more like me.


